Roughly three days remain before the final Conquest of the season. Are you prepared? Will your forces carry the day or be crushed by your opponents?
Conquest 101
Quick review for those who haven’t fought hard in a Conquest in the past:
Conquest is vastly different from the rest of the season. If you’ve only scratched the surface of these epic battles so far, it’s definitely worth it to dive in and fight for your guild. If you haven’t joined a guild, Conquest is one of many great reasons to do so. War is a team sport!
During the Conquest, guilds will compete for control of the 16 Ruins positioned around the map. Normally these can be explored by any player, but during Conquest they become positions that can be occupied. Guilds will plan which to attack and make large rallies to fight off the competition.
Guilds gain points for each second they occupy a Ruin, but they’ll also get a large chunk of bonus points every 30 minutes for the 90 minute duration of Conquest. After the first 30 minute period, the Ring of Ruin will open for conquest in the center of the map. This provides more points than each Ruin and is often a critical factor in determining the winner.
Points gained in Conquest are based on the rank of your guild, and each guild’s members will get a portion of those points equal to their contribution percentage, which is viewable on the “Share” screen in the guild menu. At the end of the season, 60% of all season rewards will be distributed to individual players according to their Conquest rank.
The Battle for Season 5
Now that we’re all caught up with each other, let’s break down where we’re at in season 5. SquareXII is firmly in the lead with their members occupying more than the top 30 spots on the leaderboard!
BTB isn’t going down without a fight though, and they’re not too far behind. EPx and GFX could still be players in the top ranks yet with some fireworks in this last Conquest.
Dome seriously dramatic action will need to happen to unseat XII from the Season 5 throne… but unexpected things happen in Conquest.
Conquest Tips
Let’s run down some quick tips and best practices for Conquest.
Even if this is the first time you’re going to join the fight, there’s more battles in the future. Season 6 is just around the corner. Give it all you’ve got this time to sharpen your tactics for bigger battles ahead!
All you seasoned veterans may find one or two things in here to improve your game… no captain knows everything!
Synergy, synergy, synergy…
War Synergy is everything in Conquest. Hunting Synergy does not count in PvP combat.
This is very important. This means your 9m power fire troop will be much less powerful than your 7m light troop with 40% War Synergy. Light and Dark are crucial in Conquest, and don’t mix them in your troops when possible.
No T1s
During normal gameplay, a lot of captains will mix in a few T1s with their troops to absorb any losses they may take. The lowest tier soldier dies first.
Don’t do this in Conquest. It lowers your troop power by a lot, but also your War Synergy. There are no light and dark T1s. If you are very short on high tier soldiers, use T6 light and dark. Make a pile of them the day before Conquest and mix them into your saved troops.
Follow the Leader
If everybody in the guild is doing their own thing, you won’t get very far. Designate rally leaders, then designate backup rally leaders. Listen to your rally leaders – argue about strategy before and after Conquest. Make sure you’ve got at least a few groups working on different goals at the same time, but coordinate them towards one greater goal.
At a last Conquest like this, most players will have at least three if not all four operational slots unlocked. That means you could potentially have your whole guild involved in four battles at once. Some of those troops will get locked up in Ruins scoring points though… be careful to not put all your power into holding ruins and not be able to fight back against attackers!
Defend the Rally Points!
A rally disbands when the rally leader’s fortress warps. This means that if you’re holding the Ring of Ruin solidly with only minutes to go, an enemy can make your rally disband by attacking the rally leader’s fortress.
Save some arrows for when those attackers come. Try to hide your rally leaders if you can. Iif the enemy knows who they are, make sure you can defend them!
In season 1, SXII created a signature strategy to hide their rally leaders!
Don’t forget you can support an ally’s fortress with your own troops! It takes an operational slot to do so and you won’t score any points for your guild from it, but if it saves an entire rally from disbanding it could be an amazing help.
For Elysium!
The battle is almost here. Good luck captains!
Of course Alex and Emma will be back to recap all the action next week. Get out there and give them something to talk about!
Miss the last conquest? Check out the recap below!
When the people of Rewban the Aggressor first colonized the planet of Cacus, they were prepared to forge a new life from the inhospitable terrain of the molten world. As they began excavations, however, it became clear that they weren’t the first to have this idea.
Large ruins were discovered all over the planet, and the new Cusans were more than happy to utilize this treasure trove. Little is known about the lost race that previously inhabited these vast caverns, but the Cusans of today are more than happy to pluck the precious gems from these deep places to trade with the rest of The Planetary Union.
Of course, the Tank Olympiad has found a home in these caverns as well. The heat of Cacus is the perfect venue for Spider Tanks mayhem!
Know Your Battlefield
Dragon Cave is incredibly symmetrical compared to most arenas. While this offers a definite advantage to keeping up your strategy while you’re on the move, it also presents issues for team coordination. A split decision between two Tank Pilots could lead to easy pincer attacks from your enemies.
There are four repair kits at regular intervals around the perimeter of the central ring of Dragon Cave. There are four distinct types of area, each repeated four times in a circle.
Area 1: Satellites
These four circles on the very exterior of Dragon Cave are useful as a sort of redoubt when in trouble or regrouping, but they can also be a cruel trap.
Each of these has three angles of attack clearly pointed at them. Attackers will come at you around the corners or shoot with a longer range weapon across the pit. If you’re playing a shorter range weapon, don’t use these!
These areas are, however, absolutely critical in Chicken Chaser. Make it a point to check the far edges of these circles regularly, as birds will commonly be stranded over here and overlooked by other players!
Area 2: Roundabout Pullovers
These four circles are in between and just inside of area 1’s circles. These are even more congested and wide open than area 1, but they are absolutely critical to maneuvering through the arena.
User these but avoid lingering in the middle of them. When standing in the center of these circles, you can potentially be hit from four different angles. Approaching the edges of these circles necessarily obscures attack from multiple angles due to the pillars on the four corners of these circles.
Consider these transitional places when possible. Stage attacks from here and pull chasing enemies through them, leaving them guessing which exit you’ll take.
Area 3: The Chasm Gap
The small strips between each lava chasm are absolutely critical for dominance of the arena. Each of these is protected by a narrow fence on either side of the chasm, providing a decent amount of cover despite being in the middle of all the action.
Depending on the match, these can either become hotly contested or major defensive bulwarks… and which could shift quickly according to the flow of battle.
Since these areas almost always play a role in how the match plays out, it’s fitting that the Command Point in King of the Hill will spawn on the north most of these areas.
Area 4: The Inner Circle
The inner circle is in theory the most exposed area in the map, but it enjoys incredible cover from the ancient dragon statue towering overhead.
Hugging these walls can leave you covered against half the map, and you can quickly race around the small circle to reposition yourself better than another tank can from any other part of the arena.
Poultry Pusher often becomes the most violent as the payload processes on either side of this area. Even in other game modes though, this will be one of the best angles of attack. With only a few seconds of movement from anywhere in this ring, you can get in position to threaten anywhere in the map.
Dragon Cave Best Practices
Cover Isn’t Always Reliable
Those big, sturdy pillars on the outside corner of the south and west area 2s may seem nice and cozy… but they can be easily shot around from the adjacent area 1s with tiny adjustments to positioning.
Even on the interior, the cover you find in the shadow of the dragon can be easily compromised if an enemy moves perpendicularly away from you instead of straight towards you. A clever bunch of opponents can make those angles close in on you when most of your cover is part of a greater circle.
Enemies Approach Quickly
Thanks to the many ways to wind across the relatively small battlefield, you can get anywhere in Dragon Cave relatively quickly, even with a pretty slow tank.
Get trapped on the satellites and you may have a bad time.
This means that enemies can come from out of view to on top of you fast, and that 8-second respawn timer may be all the delay you get before an enemy is back in the fight.
Mind the Enemy’s Weapons
The weapons that you are up against make a huge difference in any match, but even more so in Dragon Cave.
Here, you’re working with very narrow cover anywhere but the very center of the map. Artillery will follow you anywhere here, and melee weapons will have very little ground to cover before they’re tearing you to pieces.
Glorious Battle
Dragon Cave’s layout is fairly simple, but underneath that lies an incredibly complex nuance to positioning if you really want to excel in this arena.
That’s all we’ve got for this week, next week though we’re powering up for some almighty BOOMs as we dive into everything about the Railgun!
Today we’re announcing a new partnership with Coinflow, our newest credit card payment processor. This collaboration aims to provide our users with a seamless credit card payment experience, ensuring flexibility and reliability in transactions across our platform.
Expanding Payment Options
In our ongoing commitment to enhance user experience, we are finalizing the implementation of Coinflow as an additional payment processor. This strategic move will offer our users another option for credit card payments, complementing our existing service. By doing so, we ensure that our community has robust and flexible payment solutions, reducing potential disruptions and enhancing overall transaction reliability.
Our integration rollout plan with Coinflow has commenced with a wide variety of eligible purchases in the Gala Games store. All items that had Stripe credit card purchases as a payment option should now show the CoinFlow option.
This initial phase will allow us to test and optimize the new payment processor before extending its use to our broader range of products in Music and Film, and add support for Google and Apple Pay.
For the first days of the new Coinflow payment option, Coinflow purchasers will receive a special 5% rebate for a limited time delivered as $GALA at the time of fulfillment (rebate amounts may fluctuate). Enjoy this exclusive rebate as we celebrate this new integration!
Start of Coinflow Rebate: 1pm PT, July 30th
We are enthusiastic about this partnership with Coinflow and the added convenience it brings to our users. Stay tuned for more updates as we roll out this feature and continue to innovate within the GalaChain ecosystem.
Thank you for being a part of our journey. Together, we are reshaping the future of decentralized entertainment and beyond.
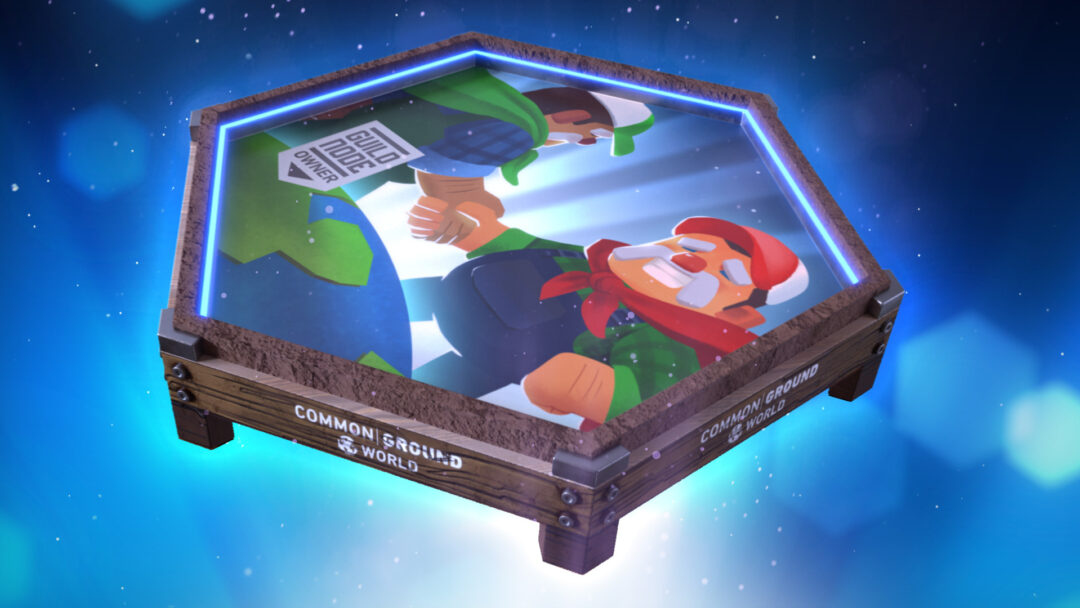
Guilds are live in Common Ground World, and Node Workload NFT owners are already rallying their guilds to build bigger and better together!
There is one more step in our distribution of Node Workload NFTs, however. Coming up next week, we’ll move to V2 of these NFTs!
Node Workload NFT V2
During the initial distribution of Common Ground World Node Workload NFTs, we made a miscalculation in our numbers, and 97 users were left without the NFTs to account for their existing Town Star Nodes. To rectify this issue and pave the way for the development of upgradable Node Workload NFTs, we will be issuing new V2 Node Workload NFTs for Common Ground World.
These NFTs will be identical to existing versions from a functional standpoint. In fact, you’ll still pile up daily $DIRT whether you have a v1 or a v2. To use your Workload NFT in-game as a guild, however, you’ll need to convert to the new v2 NFTs.
Updating your Node Workload NFTs
When the exchange opens, you’ll be able to find Common Ground World Node Workload NFT v2 in the Common Ground World Store. Unlike a regular purchase, however, the cost of acquiring this item will be one Common Ground World Node Workload NFT v1. This will initiate an even exchange for these two items, giving you the updated NFT.
This distribution will begin on July 29th at 10am PT.
At the time the exchange opens, all guilds in Common Ground World will be disbanded, as the v2 NFT becomes the official guild NFT. Guild owners should exchange their v1 for a v2 as soon as possible so they can get their guild together again using the new item.
Again, this is only necessary if you intend to use your Node Workload NFT as a guild in Common Ground World. If you do not, either the v1 or v2 versions will be identical in your wallet for the time being.
There is currently no duration for this exchange. If you purchase a Node Workload NFT v1 from a secondary market, you can easily exchange it for a v2 version. When/if the exchange is closing, we will let you know significantly in advance along with explaining the next steps.
NOTE: While you will need to have a v2 Node Workload NFT in your GalaChain wallet to use it in game, all Common Ground World Node Workload NFTs will still receive $DIRT distribution. All Common Ground World Node Workload NFTs will still get their $DIRT distribution, regardless of whether they are v1 or v2 – in your GalaChain allowance or your wallet on GalaChain.
Building for the Future
We realize this may be an inconvenience for some, but seeing this process through will create an easier path forward for all players. We’re proud to be the first operating Node Workload NFT in the Gala Ecosystem, and we thank you all for taking this journey with us!
This transition is coming. We’ll be in touch with more details as it approaches, but we wanted to alert everyone to the change as soon as possible.
Get your guilds ready and get the word out there so you can keep building the future of Common Ground World!
In our continuous effort to enhance the security of GalaChain, we are implementing a significant security upgrade to the GalaSwap API that will require action from users of the API. If you’re using the GalaSwap API, we appreciate your cooperation in this process to ensure that your integration continues to operate correctly.
Security Upgrade Overview
This update focuses on enhancing the security of API operations by standardizing the signature process. Moving forward, GalaChain will only accept one specific signature out of the two possible valid signatures for any given operation. As a result, API users must update their signing code to generate the newly accepted signature. Failure to do so will cause approximately half of your signed requests to the GalaSwap API to fail with an error message such as “S value is too high.”
Required Actions
Review and Update Request Signing: Please consult the updated Request Signing section of the GalaSwap API documentation. Ensure that your signatures are normalized according to the new guidelines provided in the example code.
Update Your Code Before August 1, 2024: It is critical to update your code to comply with the new signature requirements before the deadline. This includes users of Gala’s open-source bot, who should pull the latest version of the bot’s code. If you interact with third-party services using the GalaSwap API, consult the operators of those services to confirm they are also prepared for this change.
Why This Matters
This proactive security improvement is not a response to any current vulnerabilities but a strategic enhancement to our security protocols. For more information on the technical details and the importance of this update, refer to this informative article on Signature Malleability.Thanks for your prompt attention and support for this important update. Ensuring the security and integrity of GalaChain remains our top priority, and we appreciate your cooperation in achieving this goal. If you have any questions or need further assistance, please reach out to Gala Support.